
Picture AI bots quietly lifting your site’s content for free. They don’t skim a page or two. They pull huge chunks to train models or answer prompts, and they ignore basic “do not crawl” signals like robots.txt. This scraping burns server resources and cuts into ad and affiliate revenue.
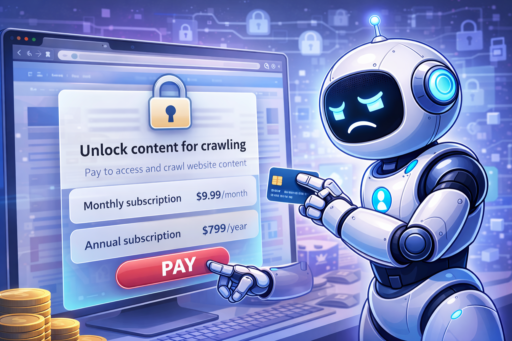
There’s a better move. Ask those bots to pay before they get in. An AI paywall does exactly that. It challenges automated agents with a quick payment prompt while real people browse as usual. If a bot pays, it gets full access. If it doesn’t, it only sees a preview or a price offer.
Meet x402, a machine-payments system for tiny, automatic web payments. Think of it like a toll booth for bots that leaves human visitors alone.
On WordPress, PayLayer connects your site to x402. It detects AI bots, sends a price quote through x402, then unlocks content after payment clears. No changes for regular readers.
You set which pages need paid bot access. You also track every transaction. SEO for people stays intact.
Why AI scraping hurts publishers and how x402 enables paid bot access
Go to PayLayer.org, open Plugins, then WordPress, and download the PayLayer plugin ZIP. Write down the version number you see on the page. It helps you track updates later.
Install it from your WordPress Dashboard. Open Plugins, select Add New, then Upload Plugin. Choose the ZIP from PayLayer.org, click Install Now, activate it, and check that it appears under Settings, PayLayer.
Check system requirements first. PHP needs to be version 8.0 or newer. WordPress should be 6.4 or above. cURL or HTTP extensions must be enabled because the plugin makes outbound API calls to x402’s endpoints.
You’ll need Administrator rights on your WordPress site to install plugins and update settings.
Don’t test on the live site right away. Set up a staging site, a safe copy of your real site, and try things there first. Copy a few sample posts so you can watch how the plugin behaves without cluttering the test site.
Download and install the PayLayer plugin from PayLayer.org
Open Settings, go to PayLayer, then open the Connection tab. Paste your x402 merchant public key and secret API key from your payment provider, and save. Click Test Ping to confirm WordPress talks to x402. If errors show up, recheck the keys for typos or expired tokens before proceeding.
Set the webhook or callback URL next. PayLayer creates a path like /wp-json/paylayer/v1/x402/callback. Copy it exactly, and paste it into your x402 dashboard so PayLayer receives real-time payment updates. Without this link, the site won’t know when a bot paid, and access control may fail.
Choose currency and pricing. Pick a currency supported by your x402 provider, like USD, EUR, or sats. Set a default price per AI content request, for example $0.01 to $0.10. Cap daily spend per automated agent to prevent surprise bills and wasted resources.
Configure bot detection rules. Turn on User-Agent matching so known bots such as GPTBot, ClaudeBot, PerplexityBot, and CommonCrawl don’t slip by. Add IP reputation lists to flag suspicious traffic based on network history, not just names. For precise control, add custom regular expressions to include or exclude specific patterns.
Decide on fallback behavior for unpaid bots. Options include:
- Return HTTP 402 Payment Required with machine-readable JSON showing prices.
- Serve a short HTML teaser.
- Send lightweight metadata instead.
After successful payment, return HTTP 200 OK so the full content loads without friction.
Connect PayLayer to x402 and set global bot payment rules
PayLayer lets you put a price on bot access right in the post editor. In the sidebar, toggle “Require payment from bots” for any post or page you want to protect. Set a custom price per URL instead of one flat sitewide rate. Charge more for premium research, less for short updates.
Bulk rules save time when you need wider coverage. Go to Settings → PayLayer → Rules to apply paywalls by category or custom paths like /premium/ or /data/. Lock whole sections without touching each page. Exclude your homepage and key landing pages so visitors keep moving through your funnel.
Bots pull structured data from REST API endpoints and feeds because the format is machine-friendly. Block these too with route-level rules. Protect paths such as /wp-json/wp/v2/posts and /feeds/data.csv so scrapers don’t vacuum up data in bulk.
Human visitors won’t see changes. PayLayer runs server-side checks and steps in only for bot traffic. Sign-in flows stay smooth, and normal browsing works as before, while bots hit a paywall.
Caching and CDNs need a few tweaks:
- Bypass cache based on User-Agent so unpaid bots never get full content by mistake.
- Send Cache-Control headers on bot responses to stop paid content from being cached.
- Vary cached versions by human vs. flagged bot status.
This keeps the site fast and protects data from unpaid scrapers.
Choose which posts and routes require paid access for bots
Run a quick bot test first. Use curl with a bot User-Agent: curl -A "GPTBot" https://example.com/premium-article. Expect HTTP 402 with price, currency, payee, and a payment endpoint per x402. That confirms the AI paywall blocks unpaid bots.
Send a test payment next through the x402 sandbox or CLI. Use the exact invoice or query ID from the 402. After you send it to the quoted payee, open your WordPress dashboard, then PayLayer → Payments or Events. Find a completed payment event tied to that request. This proves the system records payments.
Retry the curl call and include the payment proof headers from x402, for example: -H "X-402-Payment: <token>". The server should return HTTP 200 and the full content with no limits. Paid bots now have access.
Check edge cases. Try an expired token or one funded below the price. Expect another 402 with an underpaid message. Push daily limits to see rate behavior. You should get HTTP 429 Too Many Requests or a 402 mentioning spend caps, based on your rules.
Open PayLayer → Reports for analytics. Review counts of blocked vs paid requests and revenue by endpoint or category. Export a CSV to compare with server logs or Google Analytics filtered for bot traffic. Numbers should match.
This testing flow covers the full path in your WordPress AI paywall tutorial for beginners, from detection and payment to validation and reporting.
Test an end‑to‑end bot payment and confirm protected access
Set a small fee, like $0.05, for each AI crawl on premium research articles under /category/premium/. If a bot scans 200 posts, that’s $10 in revenue while human readers keep free access. For pages with heavy data such as large tables or PDFs, raise the price to about $0.25 to cover bandwidth and preparation costs. Track savings and traffic in your hosting dashboard.
Create a dedicated endpoint at /api/gpt-brief that returns concise 150-word summaries of premium content. Charge per query so any custom GPT that pulls your snippets pays through x402. This turns AI-driven summaries into steady income.
Be transparent. Post clear pricing so bots know the cost before access. Set allowlists for trusted research partners’ bots with negotiated low-cost or free windows, and log their usage separately. Use denylists to stop unwanted scrapers from accessing content without payment.
Give caching close attention. Prevent paid content from getting stored where unpaid bots might fetch it later. Adjust cache-control headers based on user-agent detection.
- Roll out paywalls gradually to avoid surprises
- Review payment reports weekly and adjust prices as demand shifts
- Document your full bot policy at a public URL like /ai-access with pricing and contact info
Complete those configurations and turn passive scraping into active earnings on WordPress. Charge AI bots for content with the PayLayer plugin, let automated agents pay for access, and turn your data into a reliable revenue stream.